|
Contemporary shopping trends are gradually inclining towards digitized platforms. Online shopping sites present sophisticated product images to their audiences, ensuring optimum visual appeal. The customers, in the virtual marketing space, screen the credibility of a product through its looks. Evidently, eCommerce firms need enhanced photo clipping services to enhance the quality of their images. When you reach out to your target groups with your products, it is important to convey clear messages about your products to them. Clipping path services for business, especially ecommerce, refer to the removal of backgrounds from the images, which optimize their looks. A well-edited image captures the attention of your customers and helps to bolster your business.  Clipping path service for ecommerce Why are clipping path services necessary? Clipping path for eCommerce website is something inescapable. When you put an image for display on your website, you expect the potential customers to get a clear image of the product specifications. The background in these pictures seizes a substantial part of the attention of online shoppers. Unnecessary elements in the background distract your buyers. As a result, they may not be able to concentrate on the product you are trying to sell. Apart from these, the products look much better when the backgrounds are removed. In a highly competitive market, you need to focus on the appearance of your products on the online stores. The experts eliminate the unnecessary elements from the images and refine their looks. Today, most of the successful eCommerce firms outsource their services to best clipping path experts . They use advanced Photoshop editing tools to remove the background and make the image appear refined and attractive. In fact, there are various background removal techniques that professionals master. Where can you integrate clipping path services? The eCommerce websites carry a wide range of photographs. You can integrate Photoshop clipping path services on almost all types of images. Have a look at the various products, where a little editing can upgrade its appearance. Beauty products for models Beauty products and accessories are often photographed along with models. After capturing the images, they are edited by experts. They eliminate the background and present the images against a luminous setting, which enhances the looks of the products. For instance, an eCommerce website selling cosmetic products places the face of the model on an illuminated backdrop. Later, they work on the light and dark areas on the face. When you reach out to a reputed company for image clipping path services, the experts enhance the photograph by integrating the right textures; they usually carry out clipping path using pen tool Photoshop. This makes the eCommerce product images in your website more appealing to the potential customers. Footwear, bags, and furniture Through Photoshop, the picture editors integrate deep etching images and photo cut techniques. When the objects are placed in the background, the experts add reflections and shadows in a planned manner. This ensures a natural look in the images. It is important to make the image well-connected to the background, where you place it in your website. This is done by incorporating the right natural effects and shadows. Clothing and garments Clothes look brighter when you place them on a clean background. Online shopping portals focusing on apparel often outsource eCommerce clipping path services related requirements. Often, the websites present these pictures without a dummy. Evidently, the hands, shoulders and neck areas are to be presented in a way, that the garment looks attractive. The experts manipulate the images to enhance their looks. Besides, you need not present the images of garments along with dummies and hangars. This helps the customers to make their purchase decisions more conveniently. Well, most of the eCommerce companies outsource product photography editing services to experienced professionals, as it is difficult to edit thousands of images that are placed on their websites. Trained hands can yield optimum beauty from these photos. They also take care of the resolution of the images. Partner with an established digital photo editing company to get professional support and strengthen your business.
0 Comments
Expectations in regard of portraits are nowadays sky-high mainly because of the reason that there are amazing tools and software programs capable of refining the snaps to perfection. Here some of the portrait photography retouching tips and other basics are detailed using pic monkey tool. Begin with a great colour Open the snap in Editor and select colours from Basic Edits tab. Choose natural colour picker by clicking on it and then click the white or grey area of the image. Remaining colours will automatically shift. You may clean in areas nearby the snap to analyse the way it effects. In case if the subject is in grey or while, click such areas. Else try the eye’s whites. Zoom in to ensure that eyes are bigger enough to work on. By this, you will get a great colour base for starting the retouching process. Hew the contrast Select exposure to make the contrast and brightness appear good. The contrast and brightness sliders adjusts the whole snap while shadows and highlight sliders adjust darkest and brightest tones respectively. Enhance the brightness and make the shadows darker. You can even work on highlight slider if needed. Finally it is to be ensured that there is no area of skin which is too dark or bright. Experts from companies offering professional portrait retouching services recommend this as brightness and darkness beyond a level makes the subject to lose its details. Revivify the eyes Choose eyes group and eye brighten from touch up tab. With these, eyes get a bit of punch. Then zoom and resize the brush so that it is small enough for painting just the irises. You can feel free to work and even if things turn messy, eraser can come for your rescue. Lighten slider can be used to brighten irises color and fade slider can be used if reflection is too much. This is what a typical photo editing company always does. Get rid of blemishes Blemish Fix should be chosen from skin group. This remarkable tool affects only those spots that show disparity with the areas surrounding them. To say, a pimple gets easily removed without leaving any mark. Razor bumps, minor moles and forehead spots etc. can also be eliminated without any unwanted mark left behind. Remove wrinkles Wrinkle Remover is the tool on which you can rely for removing creases and bags under eyes. Resize the brush and use wrinkle remover on specific areas followed by adjusting with fade slider. Being subtle is ideal. Though the tool can entirely remove the wrinkles or crease, doing so will make the image look fake. Whiten the teeth Mouth group has an option called Teeth Whiten. Zoom the teeth portion followed by adjusting the size of brush in such a way that only teeth is painted on. Eraser should also be made use of. This tool can be great in beautifying the smile of your subject. Make sure that the teeth doesn’t look artificial or distracting. Decrease the shine Shine Reduce is available in Skin group. Make use of a large brush to place it on a shiny spot; click it once. You will see that the shine appears less apparent. If necessary, click again on it. However, don’t overdo it. As per the companies offering photo editing services, undo arrow at bottom toolbar can be of great help. Assess and sharpen Now zoom out and look at the image. Now if needed, you can proceed with sharpening. With the said, image looks more polished. With unsharp mask, you get more control. Keep the radius slider at one and carry out the sliding of strength slider towards the right so as to see the way your image is getting affected. This help you to conclude with the right setting. Flatten, save, and crop From Basic Edits tab, select Rotate and make use of Straighten slider for aligning your photo. Use eyes as the guide and line up them with grid lines. With this minor adjustment, while feel of the picture is drastically elevated. Now you can save a copy of the image. Now based on your needs crop the image in size and shape you need. If above mentioned basics and tips regarding portrait image retouching are taken into consideration, you are sure to get amazing results. Refining of images is something to be done with passion and a person indulged in the job should be technically well versed in all prominent tools. Besides he should be creative and passionate about beautification. So, if you have plans to outsource, select only the right company with years of experience and a proven track record of highest customer satisfaction levels. Have any queries or needs related to wedding portrait enhancement and photography retouching services? Reach us. 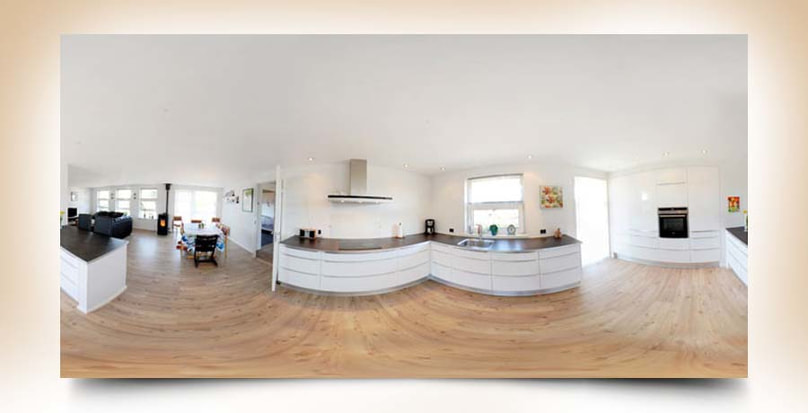 Panorama photo stitching Unlike earlier, these days, selling a property is a challenging task. With many realtors emerging every day, surviving is not that easy; it’s a fact that you have to accept. Beyond flawless and swift customer support service, there should be enough focus on image quality. They should be visually appealing and eye-catching.
For the same, panorama image stitching plays a significant role. Today, realtors are increasingly associating with image editing service providers as they have understood the inevitability of exceptional photos for successfully carrying out their business. The skills of professionals backed with advanced tools and software programs assure attractive and presentable pictures that can invoke interest in the prospects. Image retouching and editing are of numerous types but panorama stitching is the most preferred one for almost all companies and professionals indulged in the real estate business. Panoramic stitching- the underlying concept and its relevance in real estate In plainest of words, panorama photo stitching is a process of unifying multiple pictures for creating a single picture that provides a convincing and better look when matched to single pictures. This type of image editing technique is very relevant to this industry. Owing to the constraints of lens, when photographers fail to capture whole area in a single snap, stitching real estate photo is very useful. With it, users can get view of the property from varied angles. This can prompt them to take decisions quicker and in your favor. Even when the prospective customers are not present physically, the entire property can be investigated in its absolute completeness which is a great boon. This experience can pave way for positive experience and ultimately lead to sales. Read here more about different types of panoramas for real estate. Professional panorama photo stitching services inclusions The unique kind of editing includes numerous processes. Prominent ones to be mentioned are:
Proof of inevitability Studies by reputed sources illuminates that more than 50% of time by prospective property buyers are spent viewing images. The long descriptions written consume less than 25% of time. Thus the significance of apex quality photos is quite evident. Rely on the best people capable of delivery unmatched results Panoramic photography stitching for real estate is one amongst the key provisions of MAP Systems. There is a separate wing that deals solely with this specialized photo editing type. The company has years of experience in providing remarkable class of image editing services. The creative people who are passionate about the work guarantees supreme quality outcomes. Several packages are there and you can definitely find a reasonable one for you. Further details can be obtained upon contact with the company directly. 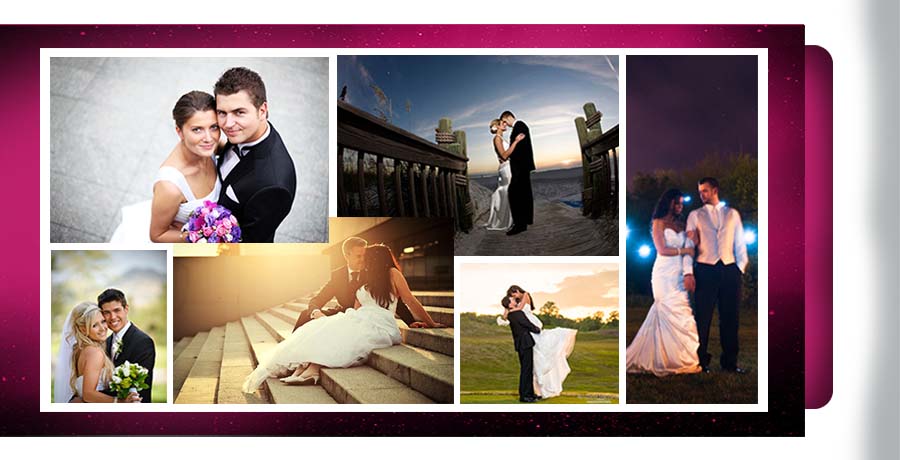 Wedding photo retouching tips Wedding photo retouching tips Wedding is a great event and the success it achieves depends on many factors. If you have handed over the task to an event management company, you can really stay confident and comfortable; this allows you to enjoy the celebration at its full spirit. One of the most crucial aspect is wedding photography and even more important is the editing process. Here some of the most effective wedding photo editing tips are brought for you. Start with an idea Many simply start with nothing in mind. They work with pre-sets and simply guess things which may work or fail. On seeing an image prior to its editing, you must have an idea regarding how the end product should look like. This will give you a proper direction to work on. Work in bulk Edit in bulk, at least some of the aspects. On batch editing, a more consistent feel is obtained on doing it one time and applying the same to all remaining photographs. Working in bulk helps a lot as it saves considerable amount of time and the entire wedding photography editing process speeds up. Pre-sets can be a time killer The basic thing that needs to be understood is that pre-sets is simply an assortment of comparative setting changes. If you start applying these, the results may seem weird as the editing needed by different photos will obviously be different even if they are captured in the same conditions. Don’t do everything in a single sitting You should know when to take rest and restart working. After some time, your eyes may become tired and used to what you are seeing. This will hinder you to see different elements from an absolute perspective. Do some edits and come back to have a fresh look on it later; this really helps. Use smart objects for smarter results When it comes to wedding image editing, Photoshop is most of the times a widely used tool but trying some advanced software programs increase the efficiency of process and save time. Lightroom can be a great alternative. Else you may also use of a mix of tools. Don’t overdo Realistic images are what you are looking for. The features of photo editing tools impose no limitations but you should set your limits or else the entire image may look like an oil painting. Professional companies offering wedding photography editing services never let that happen and they carry out things optimally. MAP Systems offers professional wedding photo editing services that are guaranteed to be of unsurpassed quality. The company offers its photo editing services for wedding photographers, couples and even huge studios. Leveraging the unmatched features of most sophisticated tools and technologies, the company is able to complete the work on time while keeping the prices cost-effective. For each category of customers, there are separate packages that suit them ideally. Contact the customer executes to make a deal today itself. 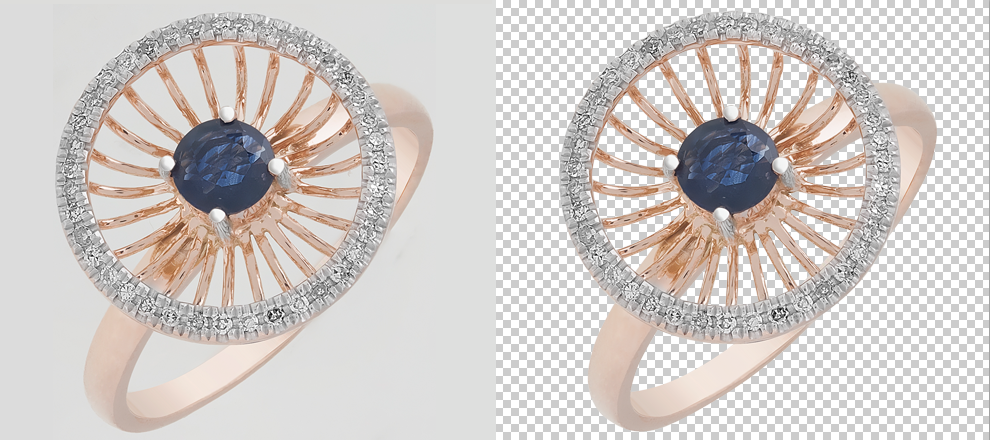 Specially when you are using images for professional purposes, removing photograph background is not a mere option but a necessity that can’t be overlooked. You can’t simply use images with dirty background. It repels away the prospects and also adversely impact the reputation of your business. Pure white is the normal colour preferred for backgrounds. This is though not a stiff rule. You can remove photo background without seeking assistance from any image masking company. Before hiring a professional for image clipping services, trying Photoshop masking technique is advisable. Clipping Path: Also called deep etching, this is one among the most commonly used techniques. A clipping path has to be drawn around the concerned object using the Photoshop pen tool for removing the already existing background. Everything outside the selected portion will be removed once this path is applied. You simply have to open the file. Then from the tool bar, select pen tool. After that path layer has to be taken and clipping can be started. Assure accuracy for the best results. Image masking: Photoshop masking techniques are preferred by a lot of professional photo clipping path services provider owing to the perfection in output received. Masking is used in specific cases when the technique of clipping fails. The latter is effective only for photos with solid and clear edges. Masking is comparatively tougher than clipping path; practicing the same can be obviously helpful. Quick Selection: In certain cases, Quick selection is a tool that turns out to be most effective. It is easy and demands least time. Most popular tools are lasso tool and magic wand. These tools perform at its best if the background and foreground stay prominently distinctive. Removing background with Photoshop is really easy. You just have to keep the above said facts in mind. |
